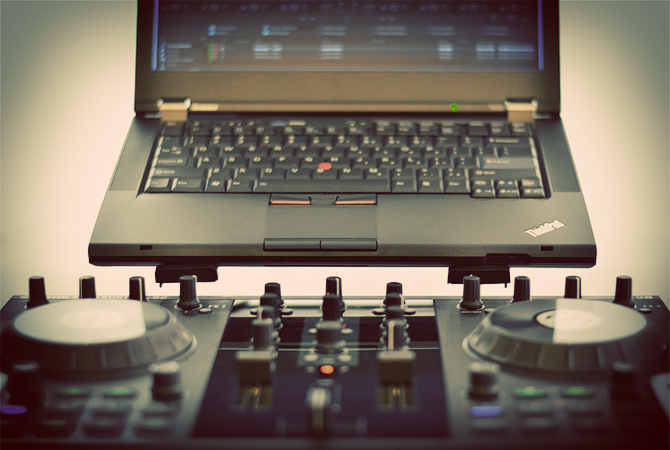
 Author: Patrick Young – Speaker Feature Studios
NOTE: Some of the hardware (and prices) in this article is starting to become dated. Although the processes are still accurate, please read my more recent article to help decide on which SSD and RAM to purchase.
I pulled the trigger on a Traktor S2 setup and after learning the controls and getting used to the software (on desktop) it’s time buy a laptop! This article is broken up into sections – things to consider when purchasing a laptop, custom upgrades to boost performance, and Windows 7 tweaks to get the most out of your hardware/software.
I included some poll questions at the end so readers could get an understanding of what their fellow DJs do. I didn’t bother re-asking questions that DJTechTools already has.
PART I: Starting with the Right Laptop
Take a little time to think about what you want your laptop to do. Ask some general use-case questions first – Do you want to use it for Traktor/Serato only? Would you like to have enough power to add some multi-track software, either live or offline? Are you more comfortable with Windows or Mac OS? Are you going to be doing all your multimedia on this machine too? etc.
Then you can ask yourself some technical questions – Do the applications I run benefit from having extra RAM, are they coded to take advantage of multiple cores and hyper-threading? How big of a hard drive do I need to store my audio library and programs? How many USB ports do I use live?
Screen Resolution
I may have put too much thought into screen size/resolution, but I kept coming back to it and it really did dictate my model/manufacturer choice and screen size.
I like to use Traktor in Mixer view and that drove my resolution requirement. At first it was 1920×1080 or bust, but I ran into a few issues going that big; first, you really have to go ~16″ or higher to get that resolution and second (and more importantly) is understanding how Traktor layout changes when resolution changes. Below is a screenshot of Traktor with 1280×800 resolution laid over 1920×1200. Notice that regardless of screen resolution, the size (in pixels) of the Mixer and Global boxes (and all controls) remain fixed. The only dynamic elements are width of the Decks and the height of the Browser.
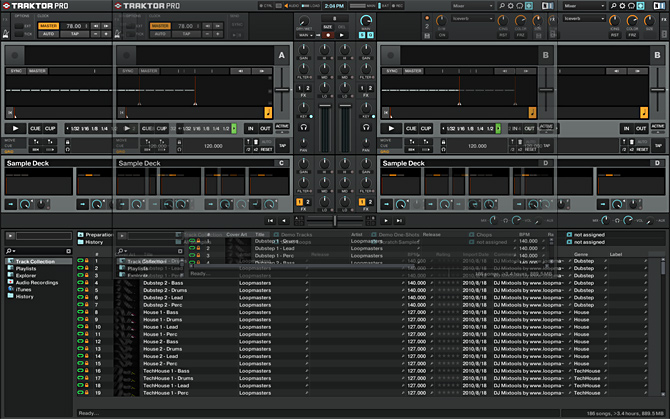 This means that the physical size (on your laptop screen) of these elements may actually be bigger on a smaller laptop with a lower resolution. You can download a spreadsheet I made to help you identify the area of 1 pixel based on resolution and screen size (edit values in blue only). Traktor has a few work-arounds to this issue like space bar to expand the browser and the ability to full screen at a lower resolution, but I would rather see a decent amount of browser tracks and I like to use the native resolution to get a nice sharp picture.
A lot of manufacturers like to hide their resolution number behind buzz words like HD Graphics, Full HD, or True HD so unless you’re consciously looking, you’ll probably end up with a 1366×768 screen in which case your Browser will almost be nonexistent in Mixer mode. Take some time to think about what controls you like to see at any given time.
Trying to balance all these factors, I went with 14″ and 1600×900 resolution.
NOTE: Most PCs are 16:9 while MacBook Pro’s are 16:10 aspect ratio so (in general) you’ll get a little more Browser height on a Mac and more Deck (waveform/stripe) width on a PC.
Solid State (SSD) Hard Drive
I’ve had good luck in the past using SSDs as system drives and will never go back to putting an OS on an HDD. I’m not going to rehash the pros and cons of SSDs here, just know that they have faster seek/read times than HDDs and can make nearly any computer feel faster.
I’ve used both the OCZ Vertex 3 and Crucial m4 with no problems and the new(er) Samsung 830s get good reviews, but do a little research to figure out what’s best for you. One thing you should look at is the SATA interface you’re going to use. Latest standards are SATA III (6.0Gb/s) bus speeds but you’ll still see SATA II being used, especially when you update to a SSD from your laptop manufacturer (it took a little digging, but it seems like Lenovo’s base SSD is a BiTMICRO 3.0Gbps).
Because high capacity SSDs are still expensive, HDDs have their place in computers requring a lot of storage. In Part II below I detail making my own two hard drive laptop – a small SSD for OS and programs and a larger HDD for my audio library. This allows me to get the snappiness I want and the ability to upgrade down the line.
No love for Apple?
Apple priced themselves out of my laptop search, but they do make slick machines (albeit, at a hefty premium). If you are used to Mac OS chances are you’re not interested in changing. I do like the feel of the MacBook Air (and similar PC versions), but they are SSD only and can only be ordered with 256GB max. The MacBook Pro 15″ and 17″ have higher resolutions, but you’ve just broken the $2,000 barrier.
For DJs on a budget, you may want to consider making your own. It’s not the most straightforward modification but the tutorials and YouTube videos are very helpful. It’s a good idea to check hardware compatibility before you attempt to try OS X. For laptops, click the “Portable Computers” link for the specific version you want to install.
Although I think MacBooks are overpriced, I do like the 27″ 2560×1440 iMac. Buy a base model and do a little home customizing and you have a high-res monster for under $2,000 (where just that resolution in a monitor can push $1000. I don’t imagine anyone would DJ an event with an iMac, but they’re at least more portable than a desktop and can give you plenty of space for a DAW.
OK, to Summarize – My requirements were as follows:
Price – I didn’t necessarily have a budget, but $500-$600 was in my head when I started thinking about a laptop. I also knew that I would rather do any hardware upgrades myself in order to save money.
Performance/Hardware – Because I want to use the laptop on the road for more than just DJing and the home workstation is a beast, I can’t have this guy feeling sluggish. Integrated graphics are fine and I’ve had good luck with Intel CPU/graphics, so I’m not considering AMD.
Storage – This is a tricky one, the laptop must be able to (internally) hold my whole audio library (currently 250GB and rising) and still be snappy. That’s going to require a dual hard drive configuration (since price is a factor) – SSD for system and HDD for audio library.
(Physical) Size – I don’t want the screen to be too small to see when performing, but I did want the laptop generally small and portable. A non-flashy exterior and solid/durable construction are desired and laptop hardware must also be accessible. It needs to have access to upgrade RAM and an optical bay that can be converted into a 2nd hard drive slot.
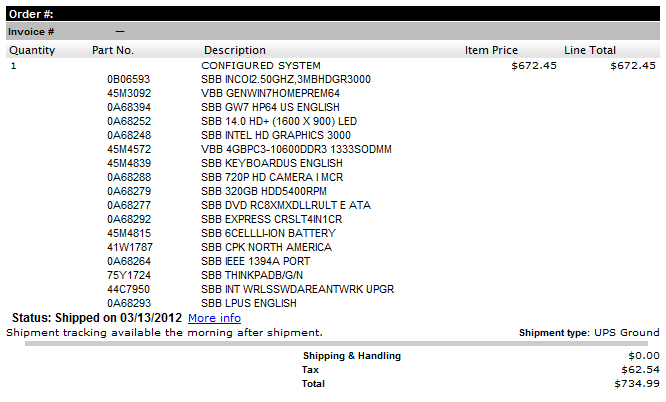
I purchased the Lenovo T420 below with some key DIY upgrades in mind:
PART II: Custom Upgrades to Boost Performance
NOTE: Although the pictures and procedures below are specific to the Lenovo T420, the ideas are the same on any laptop. Before you start ordering hardware, search YouTube and user forums for your specific laptop model to see what others have done. Chances are someone has already done the modifications you are considering. If you are thinking of ordering a T420 or already have one, check out my youtube video to see how easy these upgrades really are.
Most Laptops are easier to get into than you’d expect and doing some home upgrades is a great way to get the performance you want without overpaying.
Upgrading RAM
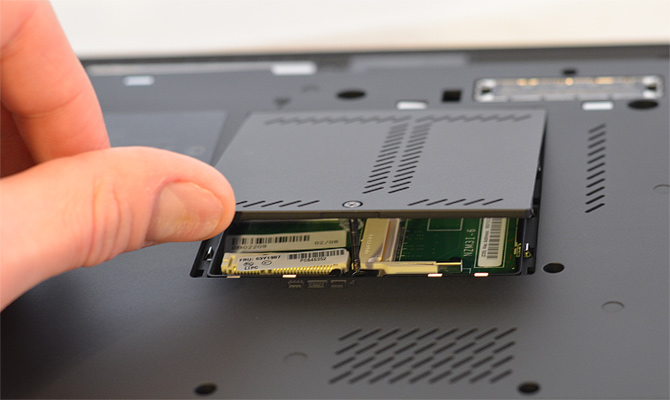
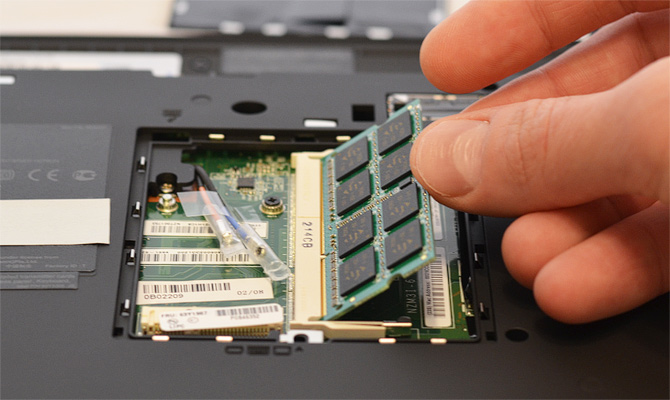
Upgrading your RAM is an easy way to save some money. When ordering, check to see if you’ll have an open DIMM slot, if so just buy a 2nd stick with the same specs as the supplied RAM. In some cases it’s still cost effective for you to replace all the RAM.
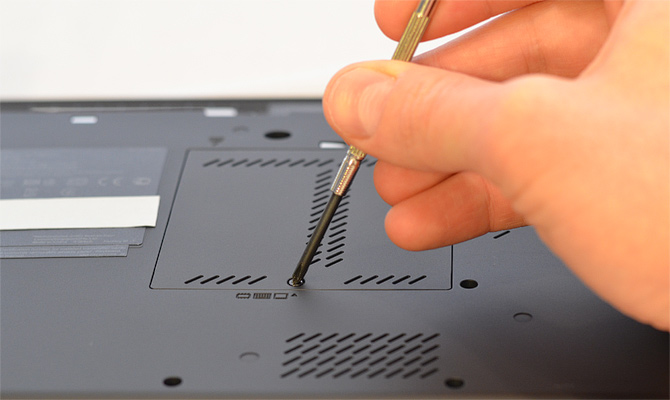
At the time of ordering Lenovo wanted ~$150 (Apple charges $200) for an extra 4GB of RAM even though hardware costs are right around $20 retail. The Lenovo T420 comes with 1 DIMM unused so I just popped off the back plate and threw in a 2nd DIMM.
Adding an SSD for a dual hard drive system configuration
I’ve built a few computers at home now that have SSDs as the system drive. I haven’t had any issues and the snappiness is so refreshing I’ll never got back to an HDD system drive. If you factor in dropping $/GB costs and the HDD shortage an SSD should be a no-brainer.
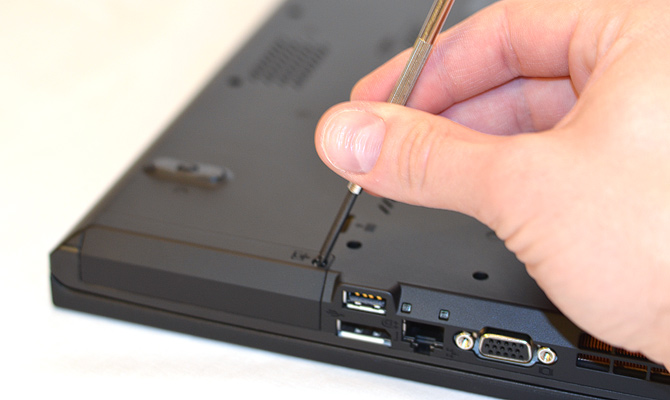
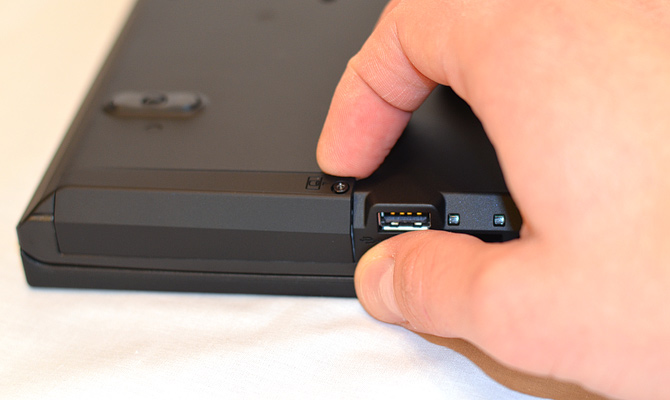
The hard drive in your laptop should be accessible and most (especially business laptops) are a simple unscrew and slide removal. I went with a 128GB Crucial M4 as a trade-off between speed, reliability, and price.
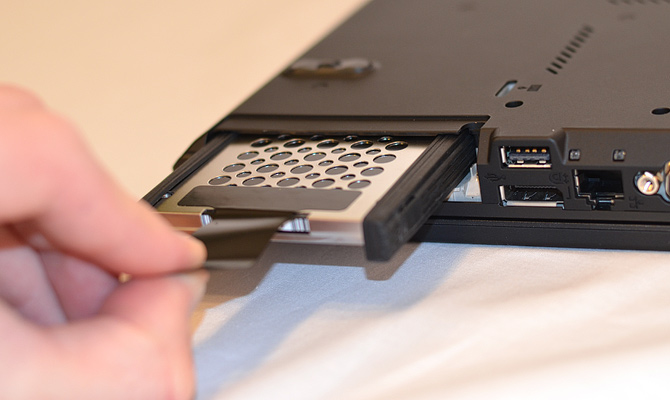
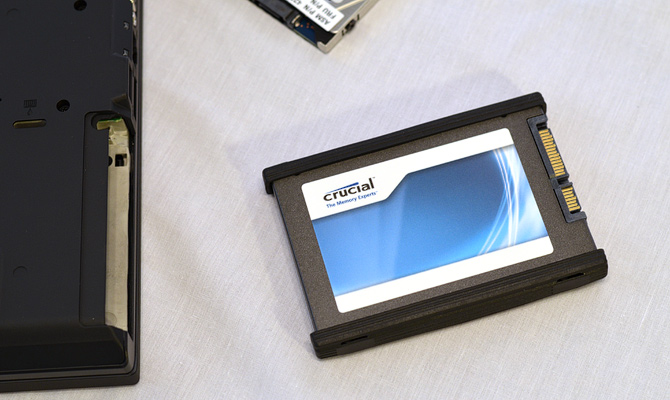
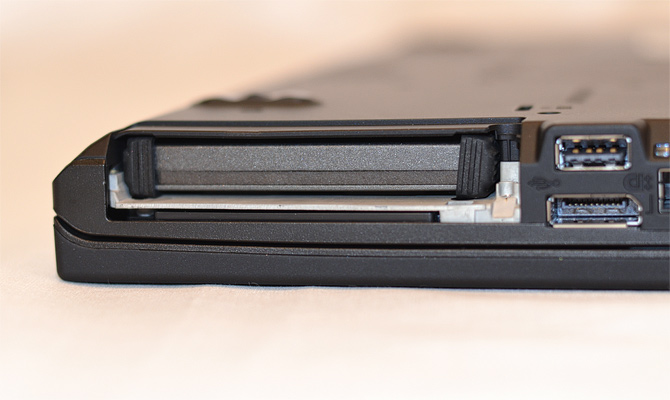
After replacing the system drive I installed a clean version of Windows to make sure it wasn’t bogged down by manufacturer software and free trials, etc. Your manufacturer should have hardware drivers available for download on its website, but Lenovo also keeps them in C:\SWTOOLS. (This article was a big help in choosing what Lenovo drivers/programs to reinstall). If you aren’t comfortable starting from scratch, you can always make a Windows recovery file.
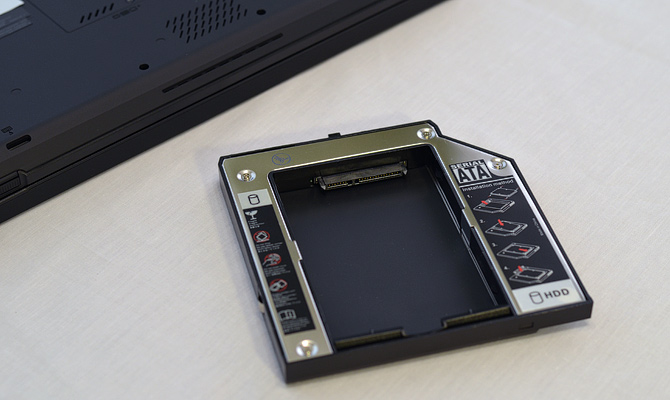
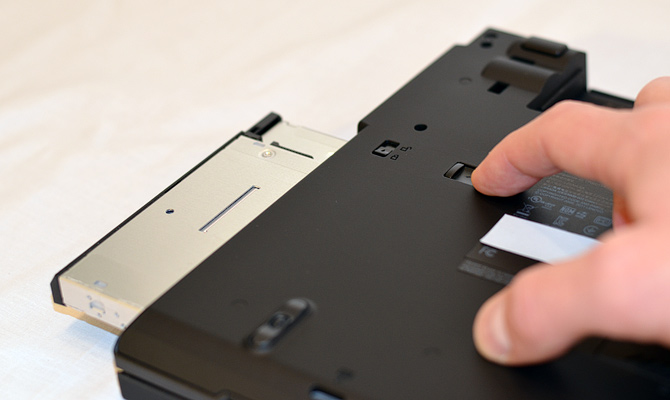
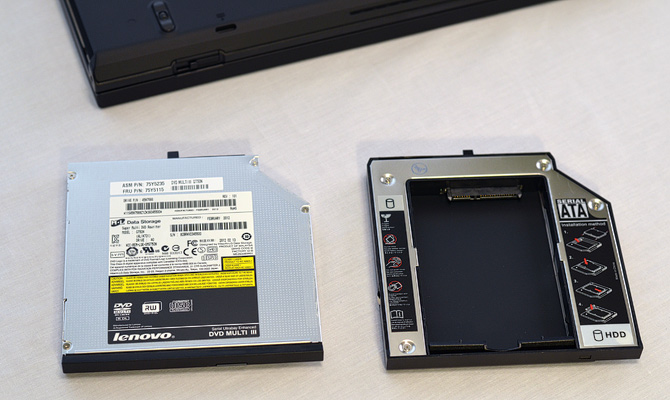
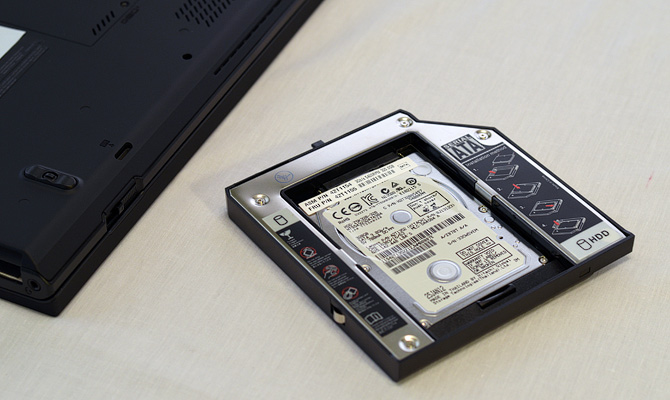
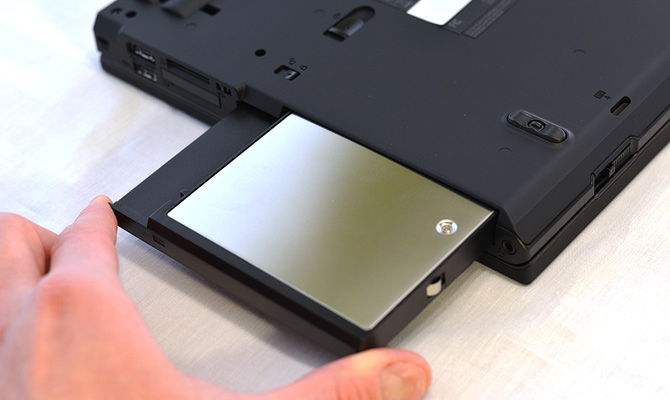
If your laptop has a traditional optical bay (DVD), then it should be able to be used as a 2nd hard drive location. I bought an HDD Caddy to put the Lenovo HDD in for my audio library. It will still have your Windows partition on it, so just reformat to get a clean drive.
Wrap Up
There you have it. I went a little over budget but not too shabby for a $800-$900 power laptop. We had a casualty along the way (RIP DVD) but it can always go external.
Full restart went from 67 seconds down to 27 seconds. Boot up from off now clocks in at 18 seconds. Below are my before and after Windows Experience Scores:


PART III: Configuring Windows
Configuring Windows 7 for SSD
Turn off Indexing
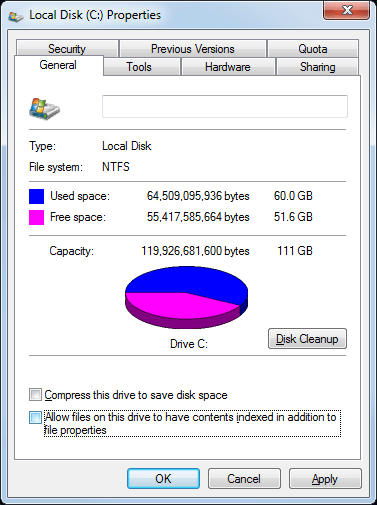
The benefit of turning indexing off these days is probably not worth the increased search time, but I still keep it off on my SSDs to reduce write cycles. To turn off indexing on your SSD simply right click the drive while in Computer and click Properties. Once that window is open, verify that the “Allow files on this…” check box is unchecked:
Turn off Hibernate
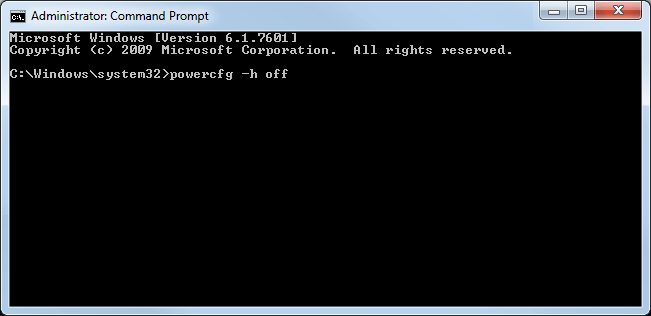
I like to turn off hibernate to free up some disk space – typically 5-10 GB that has been set aside for hibernation. Since an SSD will decrease your restart time significantly, the hibernate function isn’t as useful, and you’ll never want to go into hibernate during a show anyway.
To disable hibernate run Command as the administrator, once open type: powercfg -h off
Reduce Paging File Size
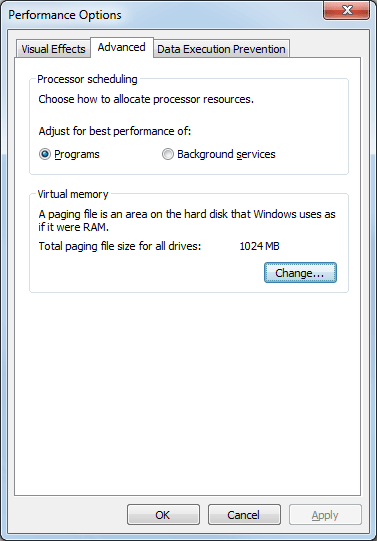
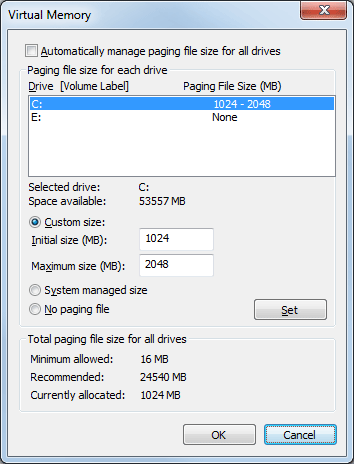
A large page file isn’t very necessary anymore with your SSD and plenty of RAM. Reducing the paging file is another way to get some precious storage space out of your SSD. I reduced mine to 1024 MB, but some say you can remove it altogether. Do a little research on what is best for your situation.
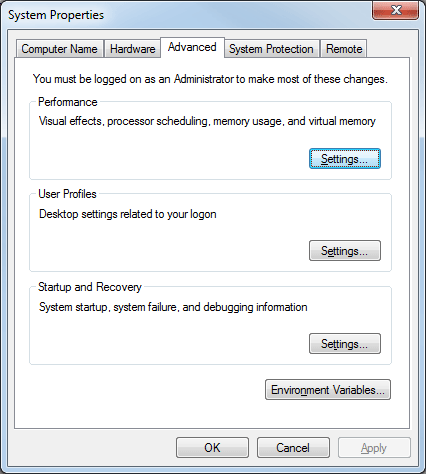
To reduce your paging file size, open the Control Panel and click System. From there click Advanced system setting on the left and it will open the box below, on the Advanced tab under Performance click Settings. Another box will open, click Advanced and look at the bottom box called Virtual memory. Click Change and make sure Automatically manage paging… is not clicked. Decrease your size under Custom Size.
(Re)run windows experience scores
Running windows experience after a newly installed SSD will make sure Windows treats your new drive as an SSD. It’ll also be nice to see your hard disk rate at 7.9.
Do not defrag your SSD
SSDs don’t benefit from defragging, in fact it can do more harm than good. Windows 7 will perform TRIM functions on SSDs and many have their own TRIM to manage written/unwritten blocks.
Keep it Clean
It’s recommended that you never fill your SSD to capacity. This will slow it down, potentially to a crawl. I like to leave a good 30-50% disk space available. If I’m working on a large project that can benefit from fast file read/writes, then I’ll pull the project folder over to the SSD, but I will move it back to mass storage (HDD) after I’m done.
Set SATA port to AHCI mode in BIOS
To make sure your SSD will run at full speed, make sure your SATA port is set to AHCI in your BIOS. If you have a new SSD, I would do this before installing any OS.
Configuring Windows 7 for Traktor
Plenty of other articles explain configuration tips for making sure Traktor runs uninterrupted. I don’t have any problems using Traktor while multitasking, but I understand better safe than sorry. Some typical processes include: disabling all non-essential utilities (wireless radio, firewall, virus scanner, etc.) that can interrupt audio playback. There are also techniques for making sure these are disabled every startup: by either creating a separate Windows profile, or even creating a dual boot system. Check out the links in additional resources below for some more ideas on keeping your OS lean and Traktor its first priority.
One thing you should be aware of is your laptop’s power setting – you don’t want your computer shutting down on you in the middle of a set so take some time to configure your power settings. Also, I turn off Windows sounds so there will never be any unwanted clicks or beeps.
Additional Resources
Dubspot has an article on optimizing Windows for DJing that goes into detail about some things that I don’t cover, but couldn’t hurt.
DJTtechTools has an article on Optimizing Windows for DJing and a Part II for creating a dual boot configuration. Make sure to read the user comments, they bring up plenty of good points.
DigitalDJTips has a lot of the same tips I do, but is an HDD pessimist and I guarantee you – your average traveling business man beats up his laptop more than your average DJ (if it breaks, he gets the day off, if yours breaks you’re out a gig).
PART IV: DJ Survey
My performing laptop is:![]() Loading ...
Loading ...![]() Loading ...
Loading ...![]() Loading ...
Loading ...![]() Loading ...
Loading ...
That’s it! I appreciate any comments/concerns/criticisms you may have, please feel free to leave a reply below, Thanks!

pretty good insights. I’ll be sure to stop by and read more from you. thanks.
This article is spectacular. Another $-saving tip: get a refurbished ThinkPad from outlet.lenovo.com.
Wonderful article, thanks! I plan to buy a T420 soon and this will be invaluable.