 If you’re a producer/artist who doesn’t always build their synthesizers from the ground up (myself included), you’ve probably knowingly or unknowingly run into this problem before.
Whether you tweak existing presets or use them straight up – they’re bound to start pretty wet to make them stand out when played solo (or demoed). This wouldn’t be such a problem, but we’re all participants in the loudness war and everything is compressed and limited. In my mixes for instance, an instrument could go through 3 levels of dynamics altering – a compressor on the individual track, a little overall compression on the master and a loudness maximizer on the final output (whether you agree with this approach or not, it’s not uncommon). Every one of these steps is increasing the relative volume of the effect(s) tails.
After compression you might notice an instrument with initially minimal reverb is now pushed further back in the mix, a delay effect is jumbling up the instrument’s melody, or a chorus effect is really keeping you’re mix from having the tightness it did when you first laid it down.
Along with compression issues, some effect tails simple get masked by other instruments and keeping instruments dry(er) will give you more room to play when mixing/mastering.
reFX is notorious for putting heavy effects on their presets. As a simple example, lets use LD Guardian MS from Vanguard which has effects: 19% delay and 8% reverb. Doesn’t sound like much, but watch/hear what happens when we start compressing:
Original:
Then run it through an 20:1 compressor (with make-up gain to match perceived volume)
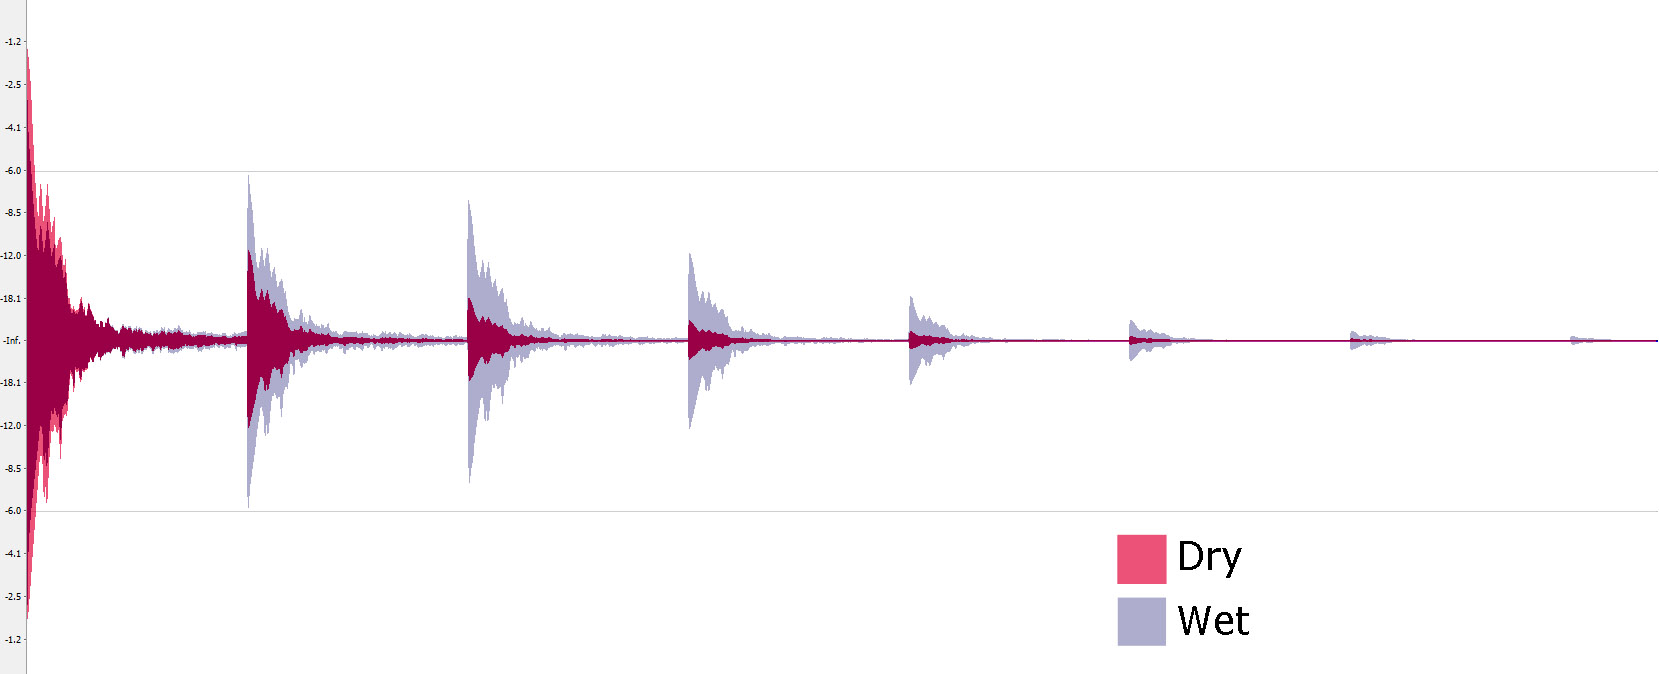
We can already hear the bite in the reverb and the delay/echo takes a long time to trail off. Visually:
Now if we run the output of the initial compressor into another compressor (10:1) and a mastering limiter (with make-up gain to match perceived volume)
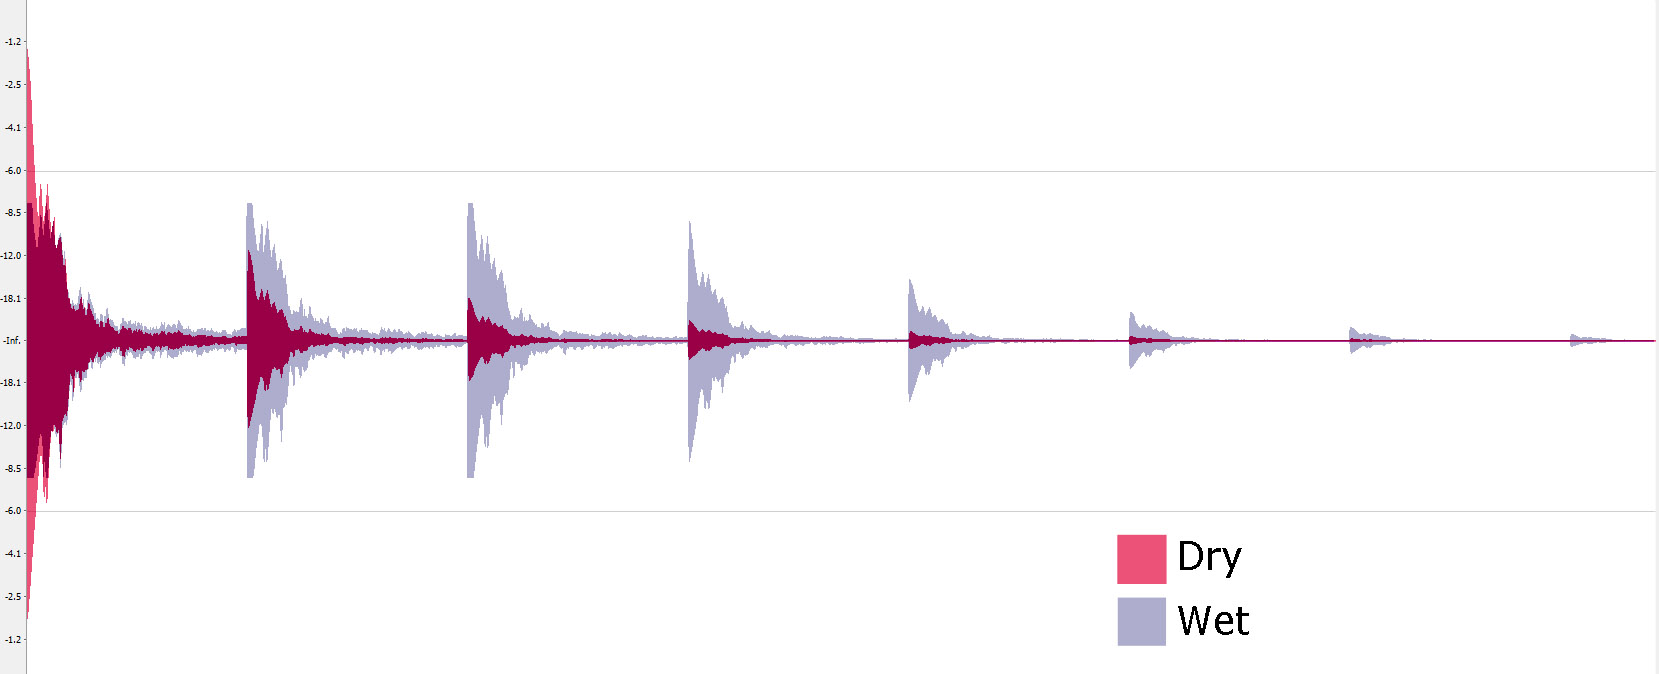
Even with a make-up gain of -8dB visually the tails are huge. The first 2 echos sound just as loud as the initial note and even clip:
To combat this try bouncing/recording your instruments dry. Then add individual or bus effects to bring the instrument back to life. In some cases it’s near impossible to get the same timbre (since no two effects are the same). As a general rule in these cases – I usually bounce/record with half the wet/dry percentage that I find pleasing pre-bounce, the exception being any bass track which I always bounce dry. Wet lower frequencies can quickly become soupy and thick.
In my DAW I’ll just mute/archive my soft-synths after I bounce to .wav so if I need to tweak the effects levels and rebounce, it’s not a big deal. If you don’t have the luxury of creating on the same machine you mix on I’d suggest the following – bounce a 100% wet and 100% dry track and use both tracks (100% Wet track will act like an effects send signal, simple adjust it’s gain for effect(s) gain). You can bounce each effect individually too so that you can control each independently. This should give you the most control if you want to keep the instruments built in effects.
Also, try adding your mastering effects sooner rather than later. I usually mix and master all at once. I’ll bounce all my virtual instruments down to .wavs, get a decent mix and then add my master effects and do a final mix (all the while trying to push the loudness). Snare drum is a good example of an instrument I always have seem to have to EQ, gain, and adjust reverb after I get the track to the loudness I want.
There are other reasons that you might want to add effects later – for instance you want all of your reverb to have the same impulse response (ie – come from the same reverb effect) or say you want to make sure all your delay is at a specific tempo, etc. I personally don’t worry too much about that (unless it’s unpleasant) and concentrate on keeping my mixes as clean as I can when pushing loudness.
Thanks for reading and if you have a different approach that works for you – share it in a comment below!
